
Why Whitelist in Office 365?
Whitelisting Dcoya is essential in order to ensure emails are successfully delivered to recipients inbox, instead of being incorrectly classified as spam or phishing all during the usage in the platform.
The whitelisting is also intended to ensure that the links within the emails are not scanned by detection engines, which could result in false positives.
Note
To ensure correct email sending and prevent any false positive bot clicks on the links attached to the emails, it is essential to follow all the steps outlined below.
Excluding DCOYA from 365 Email ATP Gateway Using Email Header and IP Whitelisting
Introduction
Email header whitelisting is a valuable method to ensure that emails sent by the Dcoya platform are not inspected by the Microsoft 365 Email ATP (Advanced Threat Protection) gateway. This document provides step-by-step instructions for administrators on how to configure a mail flow rule that bypasses ATP link processing based on email headers. This action is recommended if you have a mail filter in place in front of your mail server.
Instructions for Excluding Dcoya Platform Using Email Header Whitelisting
1. Navigate to the following URL: https://admin.exchange.microsoft.com/#/transportrules.
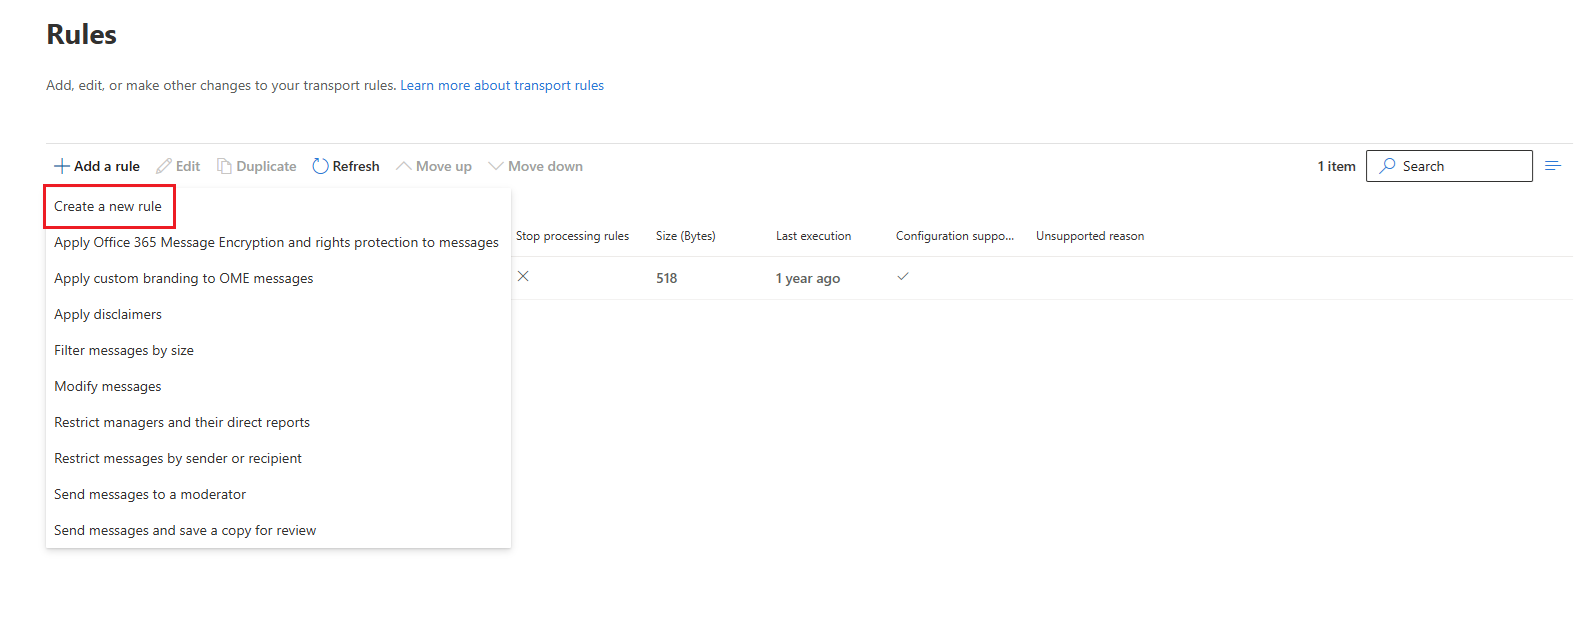
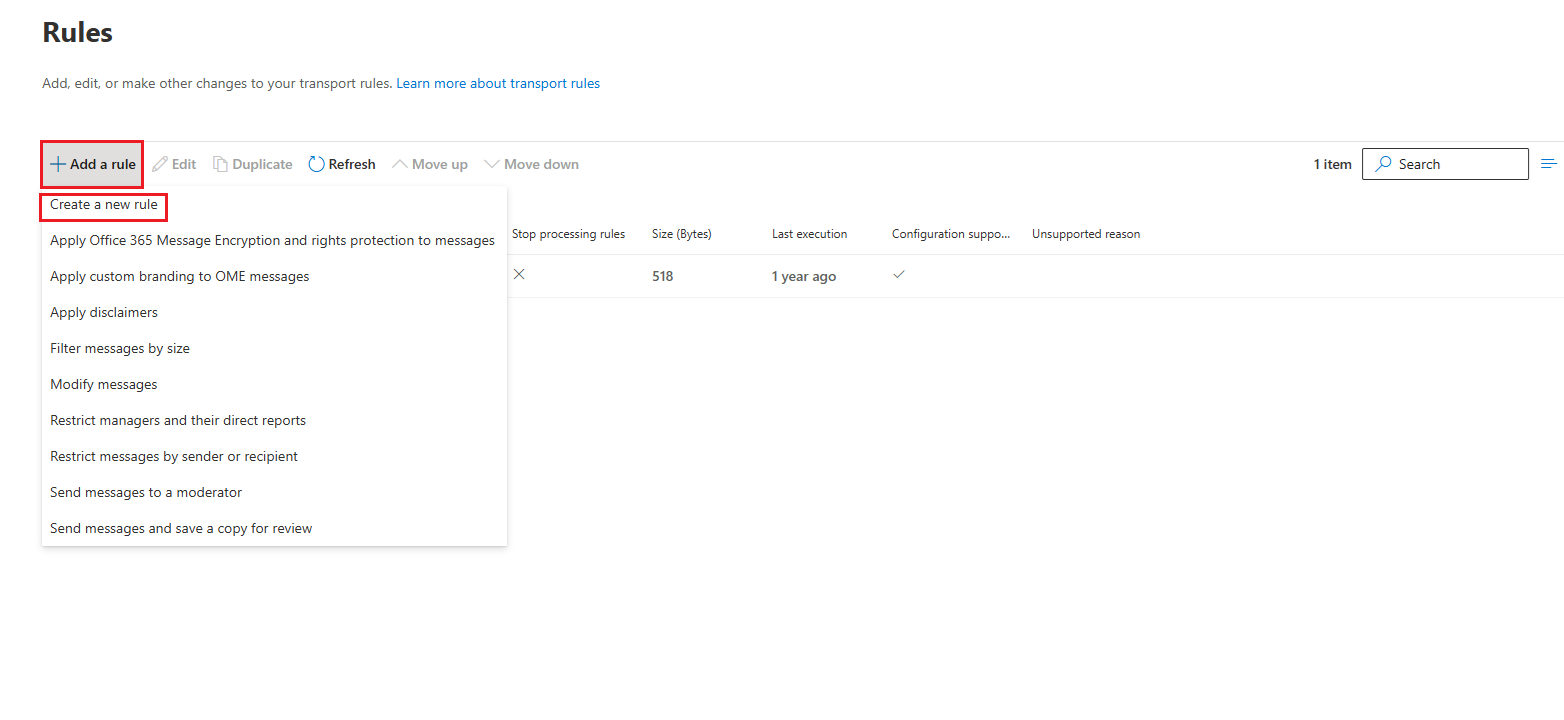
2. Click on "Create a new rule"
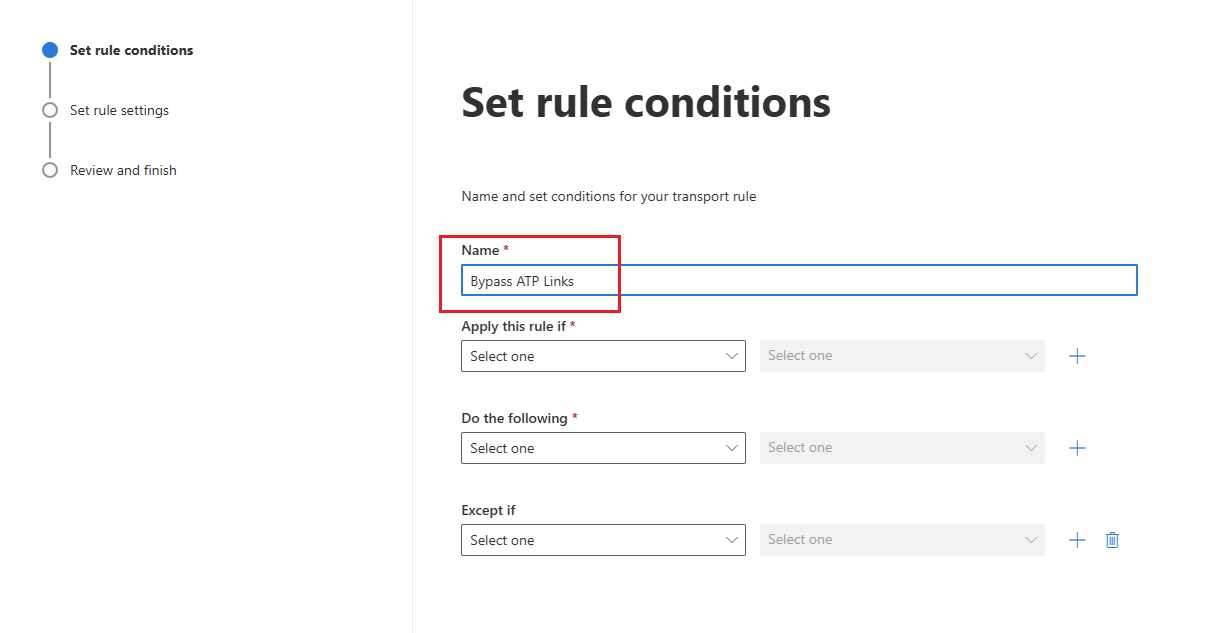
3. provide a name for the rule. For example, you can name it "Bypass ATP Links," although you can choose any name that suits your preferences
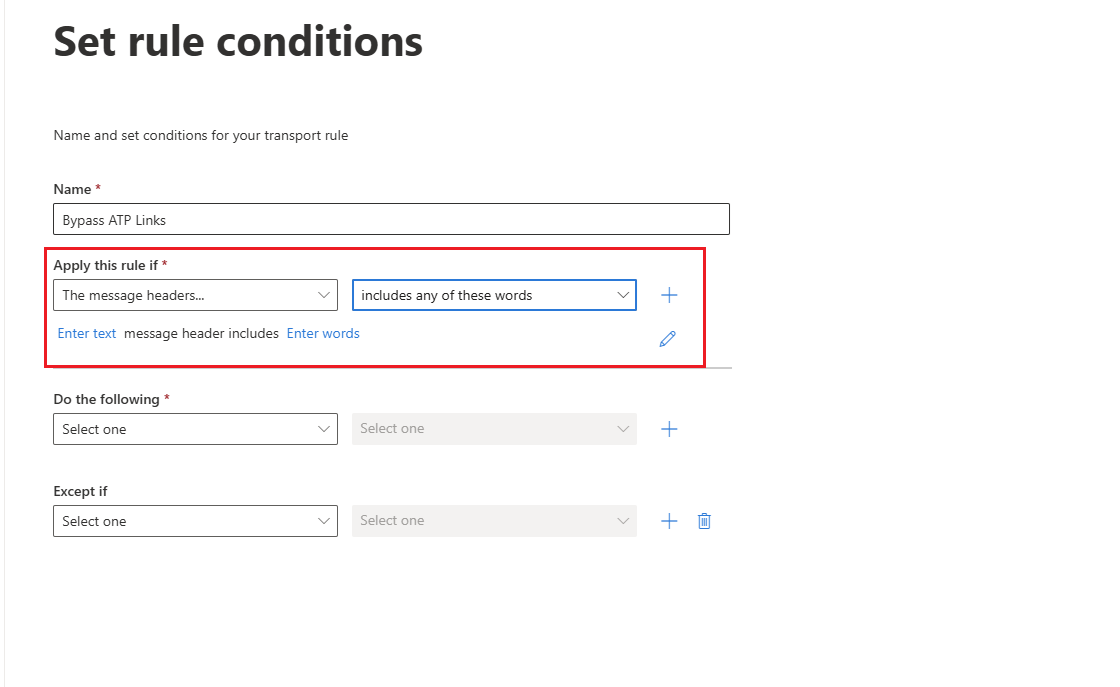
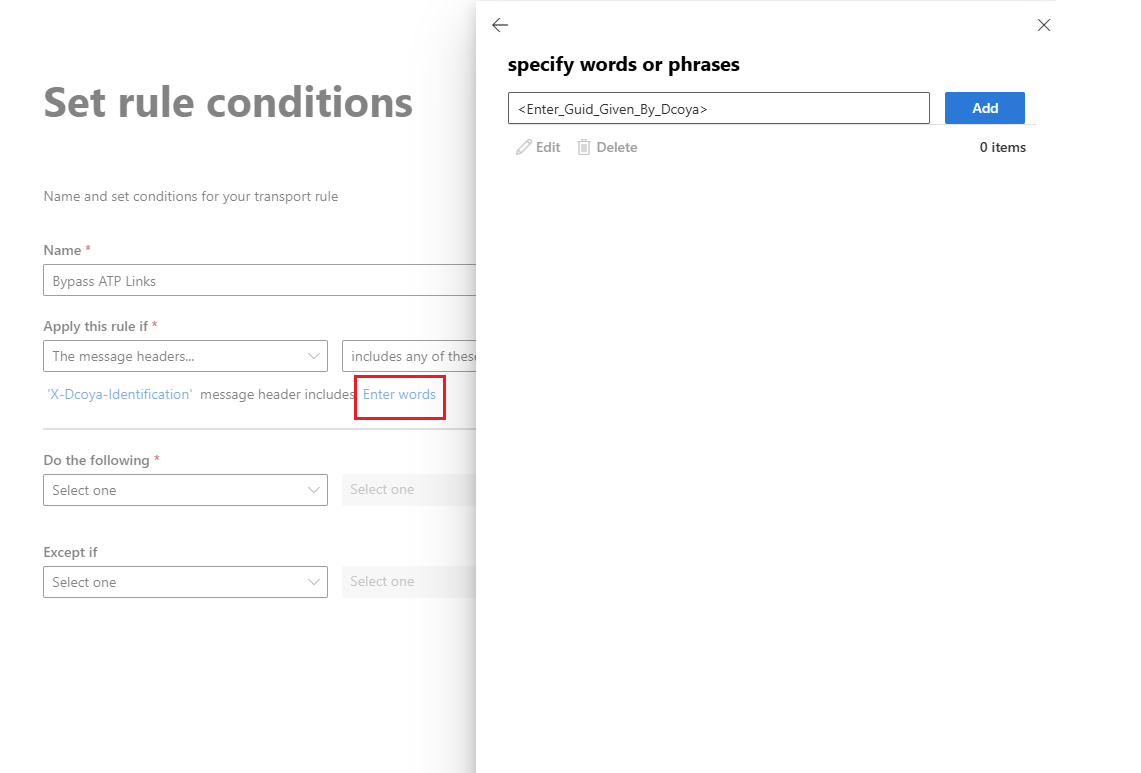
4. In the "Apply this rule if" condition, select "The message headers" and then choose "includes any of these words."
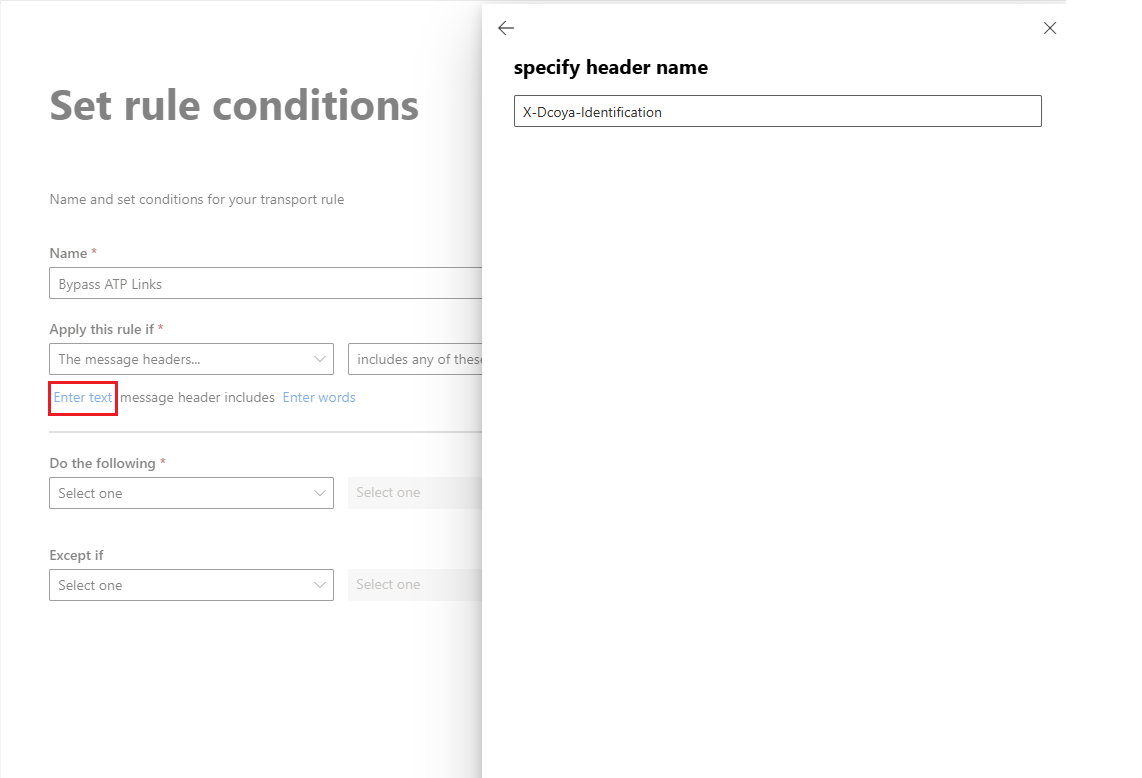
5. Click on the "Enter text" field, type the header name as "X-Dcoya-Identification."
6. Click the "Enter words" field, type the custom guid that will provide you by Dcoya Managed Service and press add.
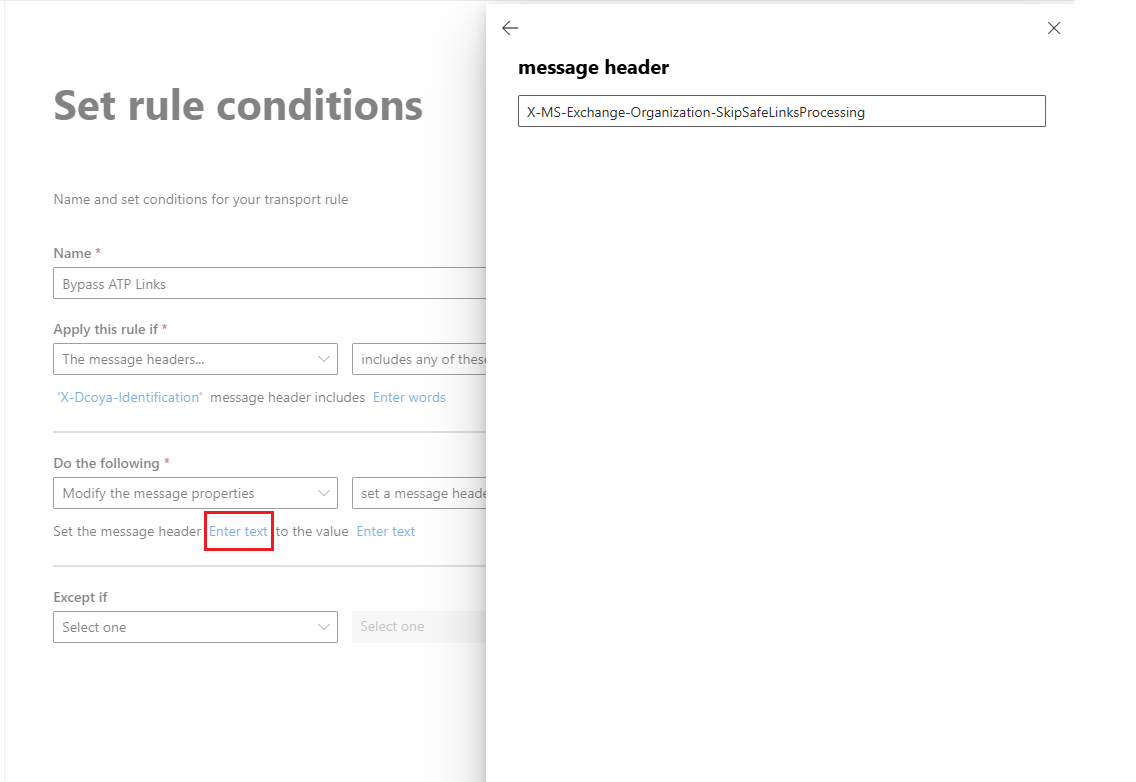
7. In the "Do the following" condition, select "Modify the message properties" and then choose "Set a message header."
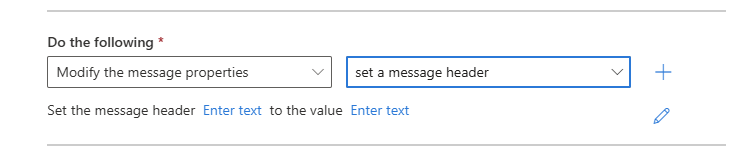
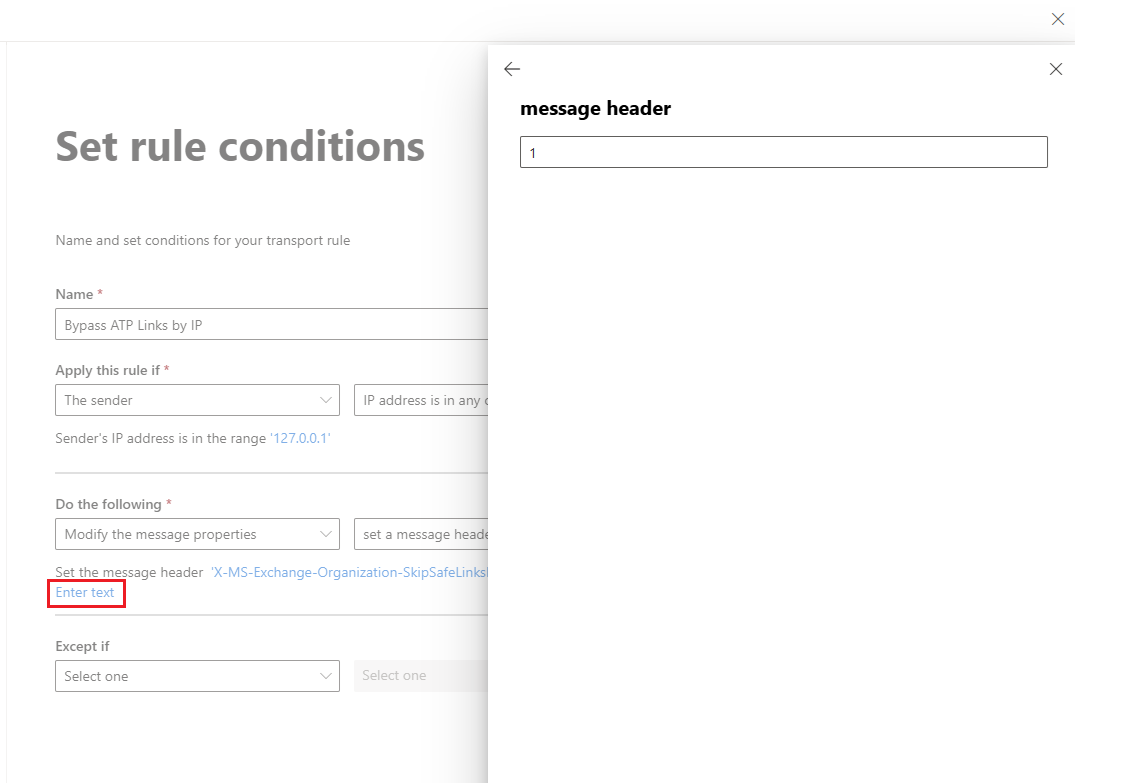
8. Click on the first "Enter text..." link and set the message header to "X-MS-Exchange-Organization-SkipSafeLinksProcessing."
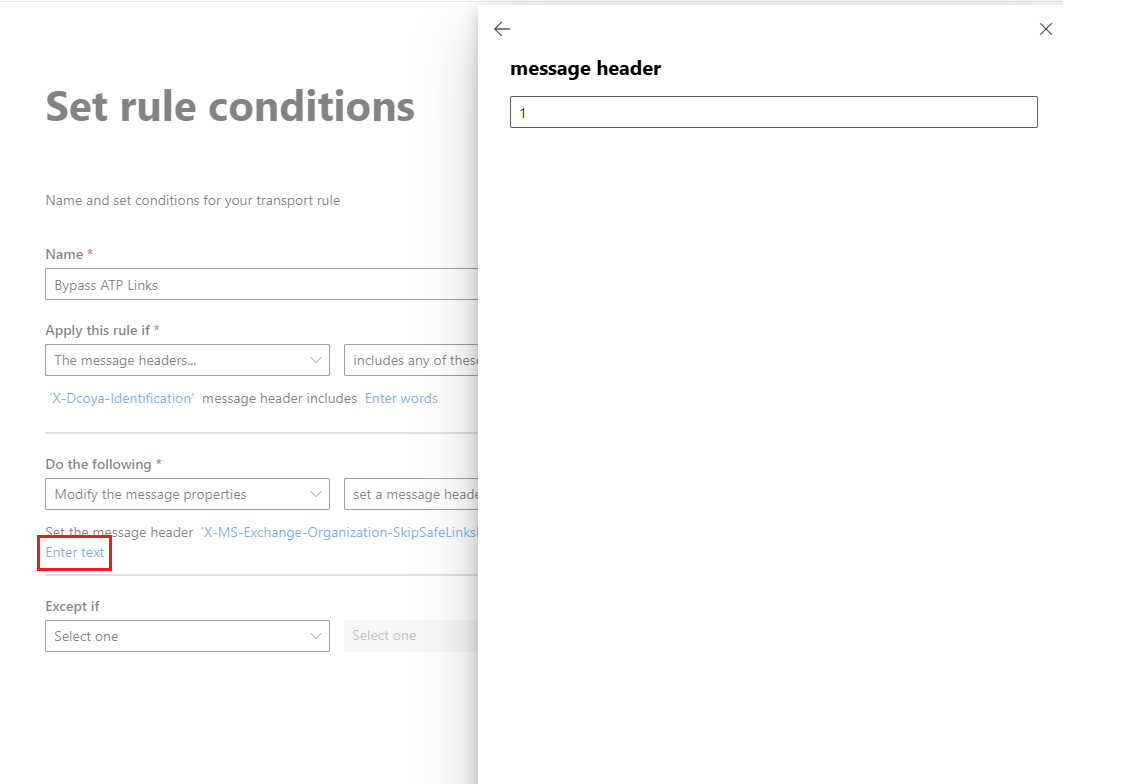
9. Click on the second "Enter text..." link and set the value to "1."
10. Ensure that your configuration matches the steps outlined above.
11. Confirm the settings and “Save” the rule.
Instructions for Excluding Dcoya Platform Using Dcoya IP address Whitelisting
1. Navigate to the following URL: https://admin.exchange.microsoft.com/#/transportrules.
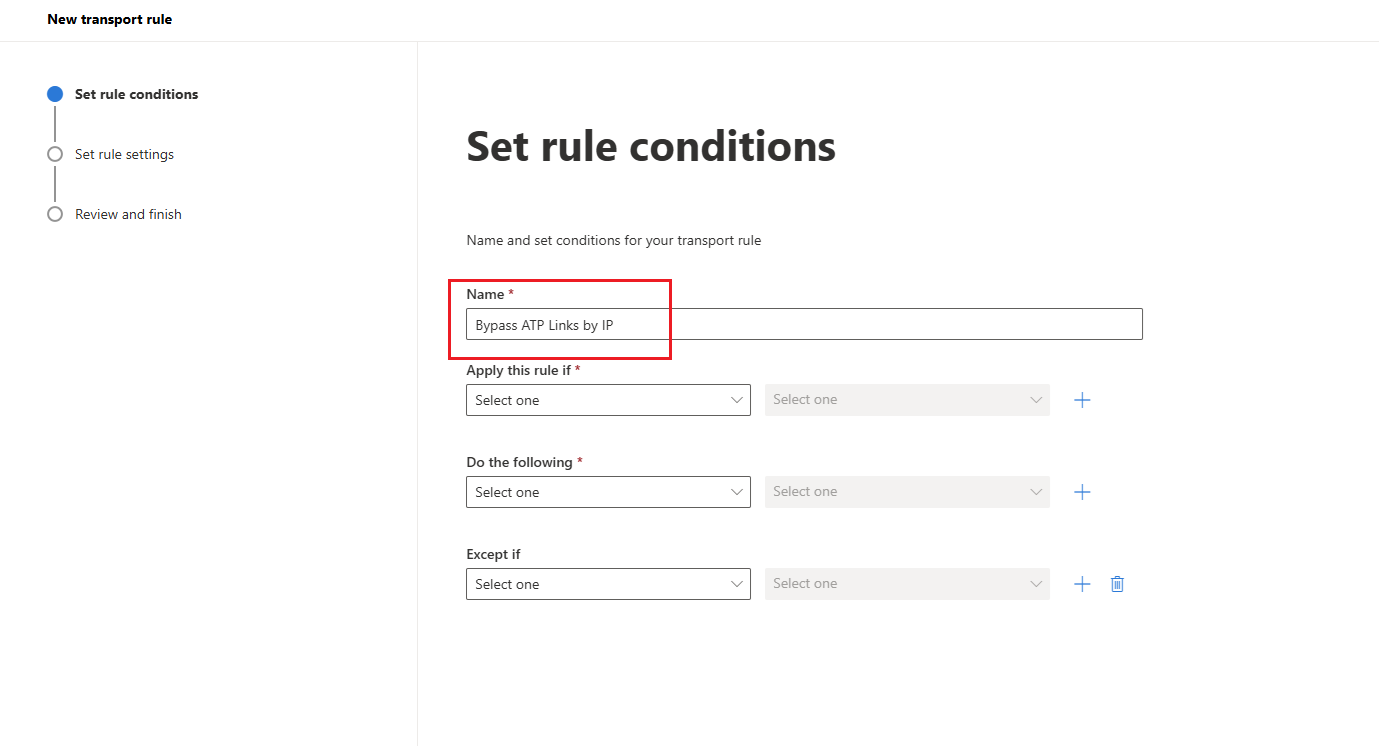
2. Click on "Create a new rule".
3. provide a name for the rule. For example, you can name it "Bypass ATP Links by IP," although you can choose any name that suits your preferences.
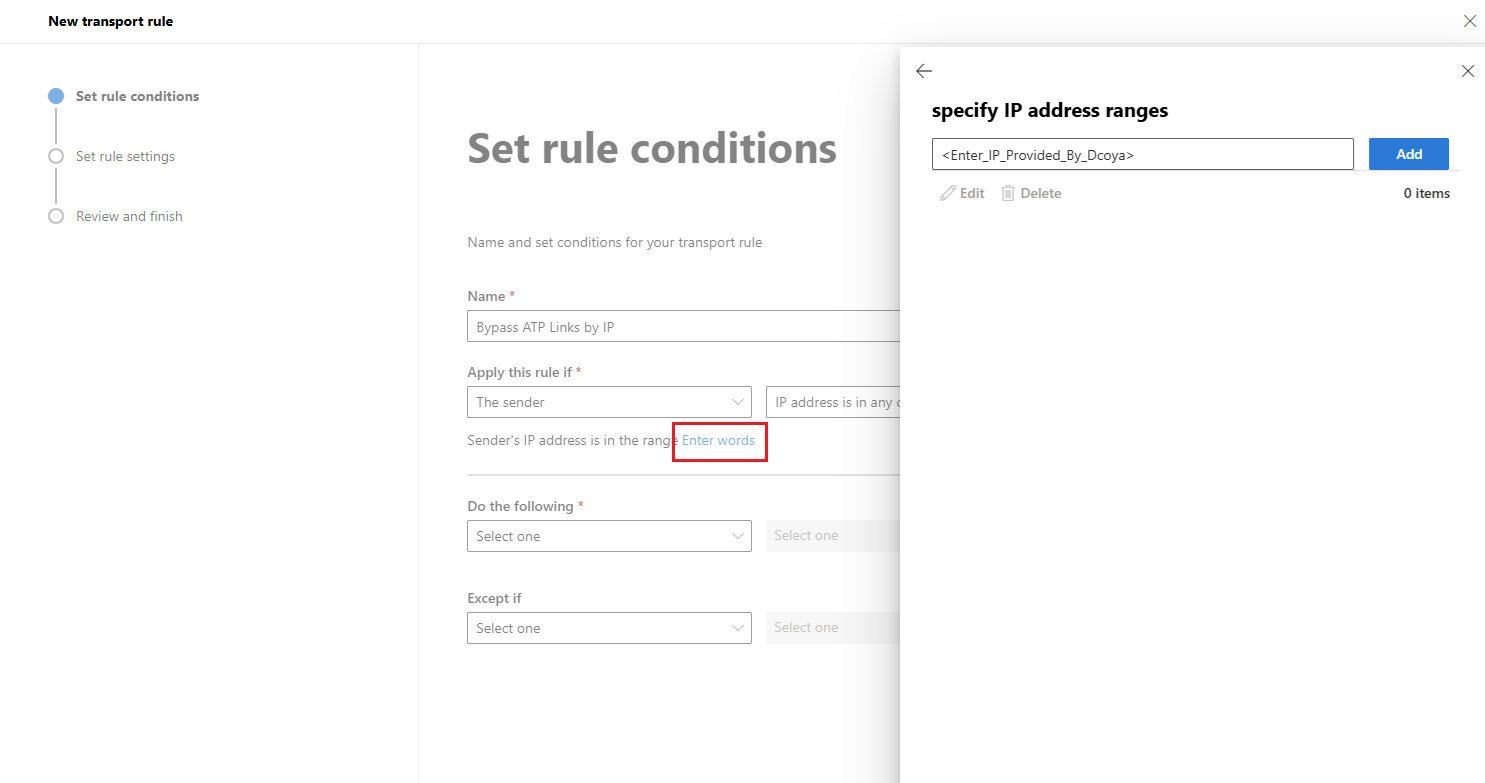
4 . Click on "Apply this rule if → The sender → IP address is in any of these ranges or exactly matches. In the designated field, input the IP addresses one by one from the provided list.

a. Click on Enter words and add the IP address provided by Dcoya Managed Services.
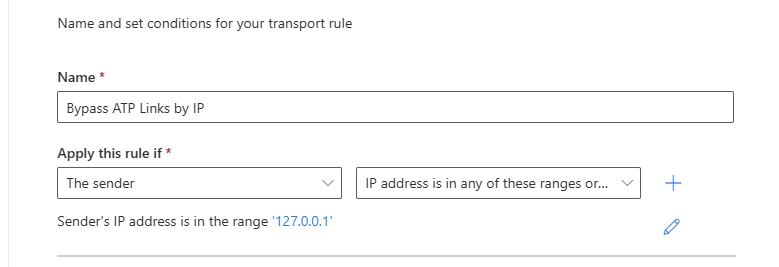
b. Remember to click "Save" after entering each IP address, they will be shown as follows :
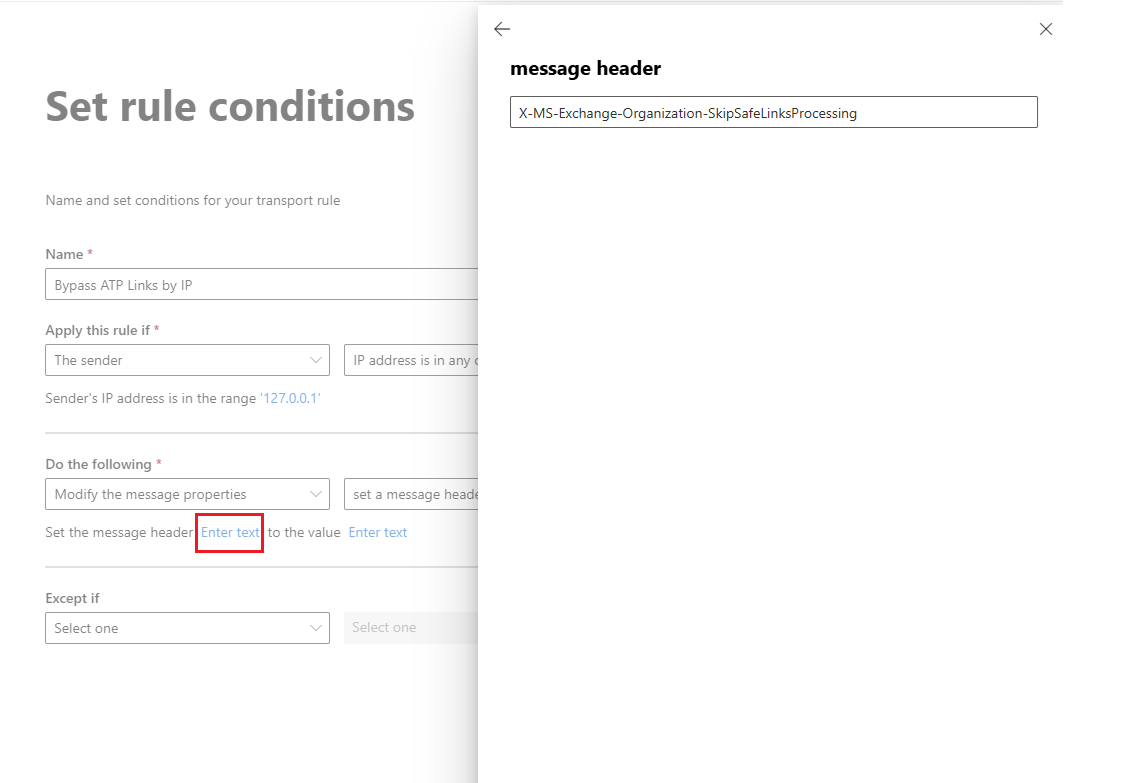
5. Click on "Do the following → Modify the message properties → Set a Message Header."
6. Choose Set the message header : X-MS-Exchange-Organization-SkipSafeLinksProcessing "
7. Click on the second "Enter text..." link and set the value to "1."
8. Ensure that your configuration matches the steps outlined above.
9. Confirm the settings and “Save” the rule.
Whitelisting Dcoya Using Advanced Delivery Policies in Microsoft Defender for Office 365
Introduction
Whitelisting the Dcoya platform is a crucial step to ensure that emails from this platform are trusted and not subjected to strict security checks in Microsoft Defender for Office 365. This document provides a comprehensive guide for administrators on how to whitelist Dcoya using Advanced Delivery Policies in the Microsoft 365 Defender portal.
Step-by-Step Guide to Whitelisting Dcoya Platform
1. Open your web browser and navigate to the Microsoft 365 Defender portal at https://security.microsoft.com.
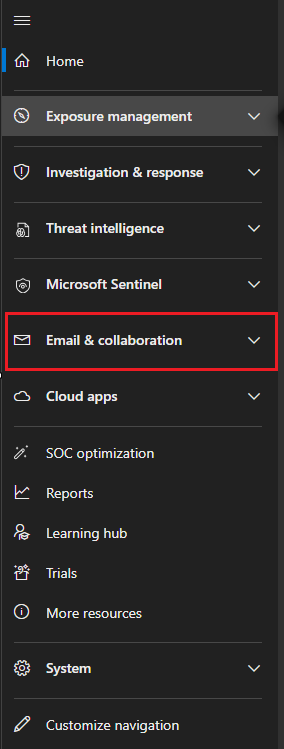
2. In the left-hand menu, click on "Email & Collaboration."
3. Access Threat Policies and Advanced Delivery:
a. Under "Policies & Rules," select "Threat policies."
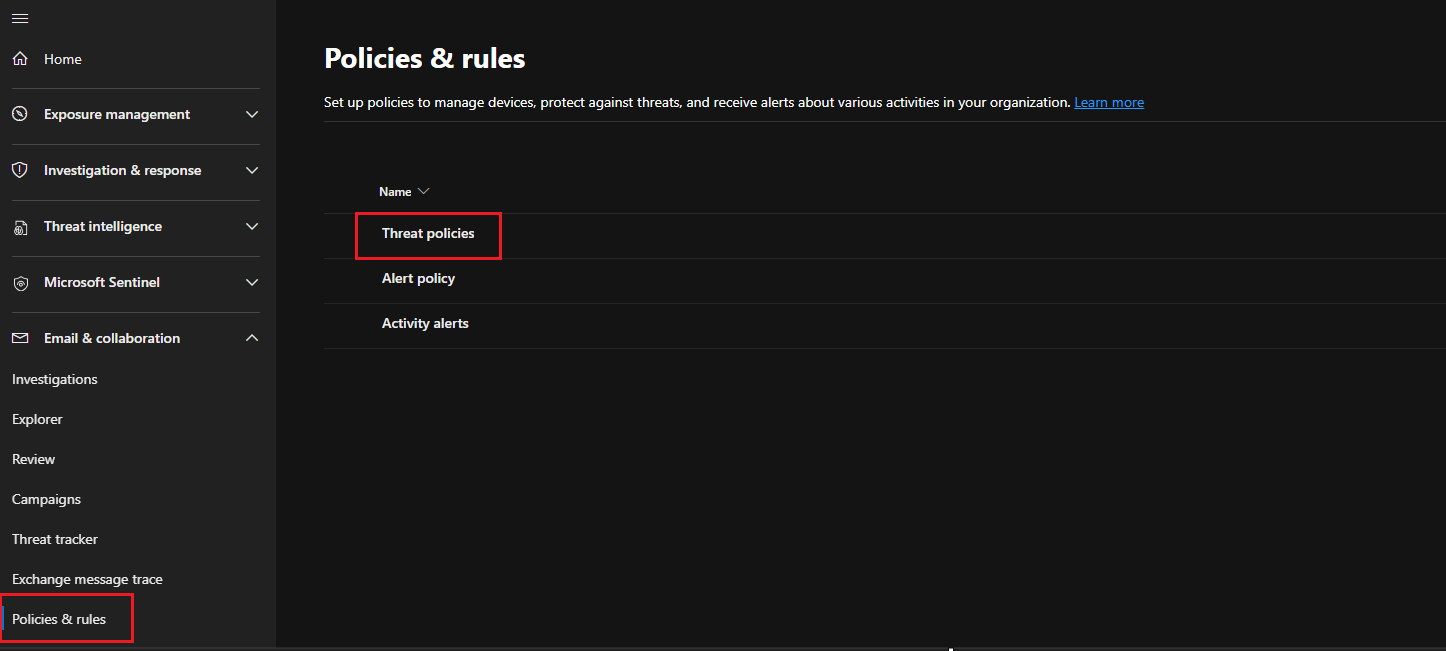
b. In the "Rules" section, click on "Advanced delivery."

4. Within the Advanced Delivery menu, locate and click on the "Phishing simulation" tab.
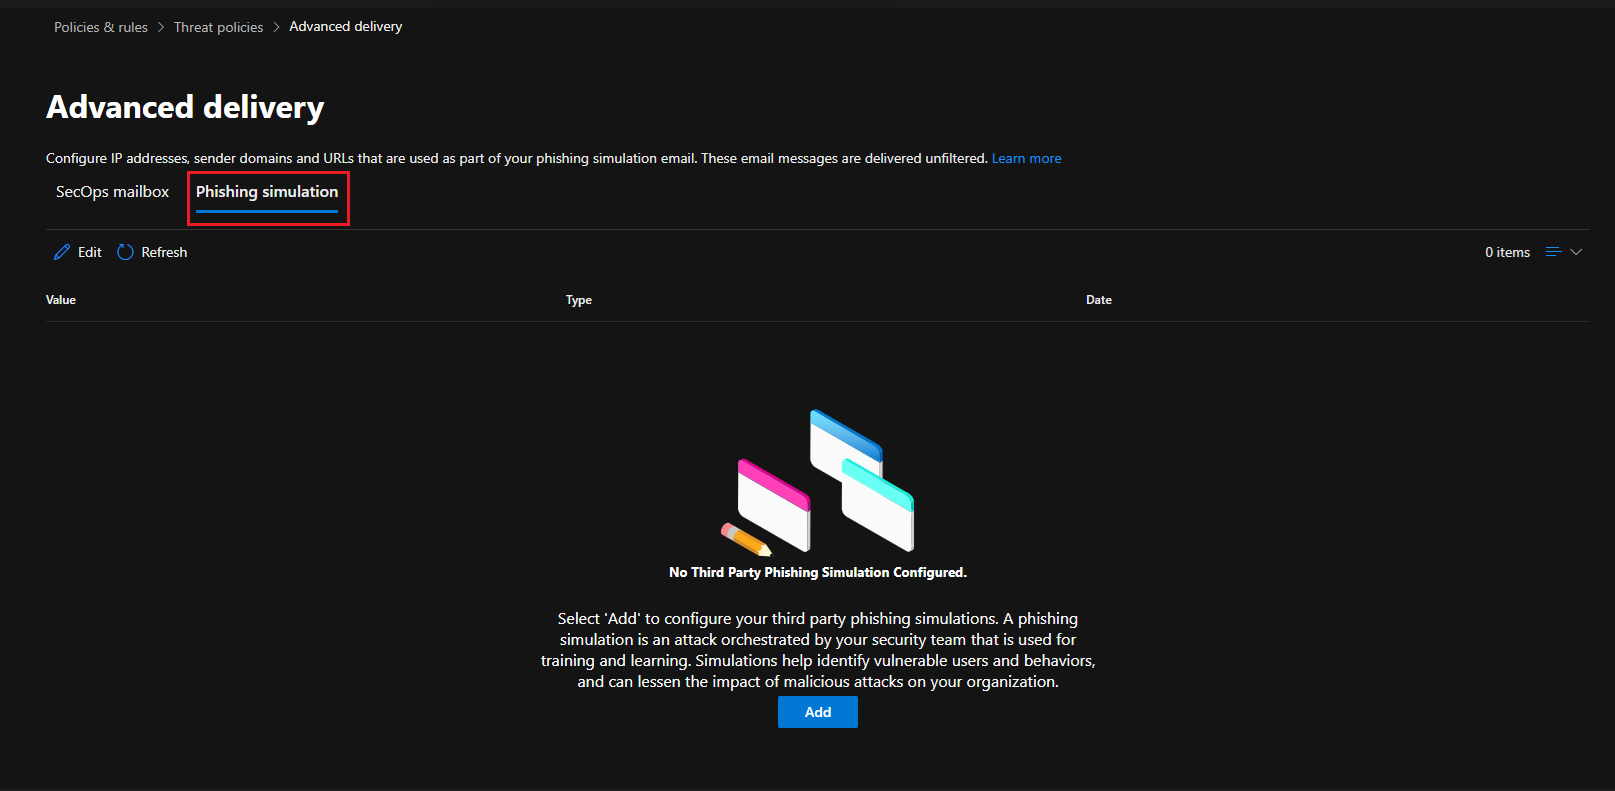
5. Click the "Edit" button to open the Edit third-party phishing simulation menu.

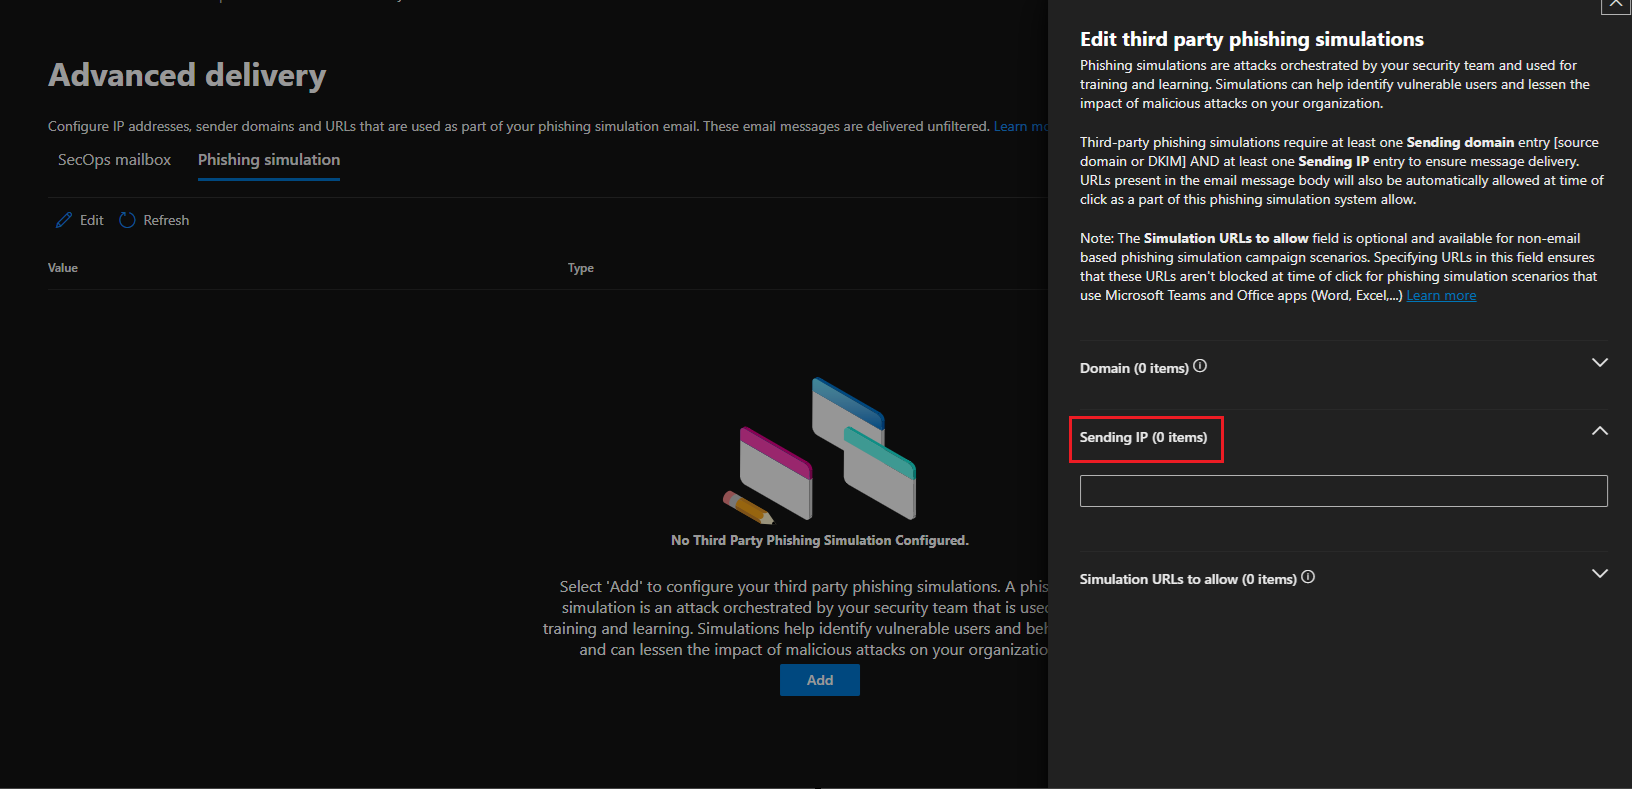
6. Configure the Following Settings:
a. Domain: Insert the phishing (sending) domains provided by Dcoya Managed Services.
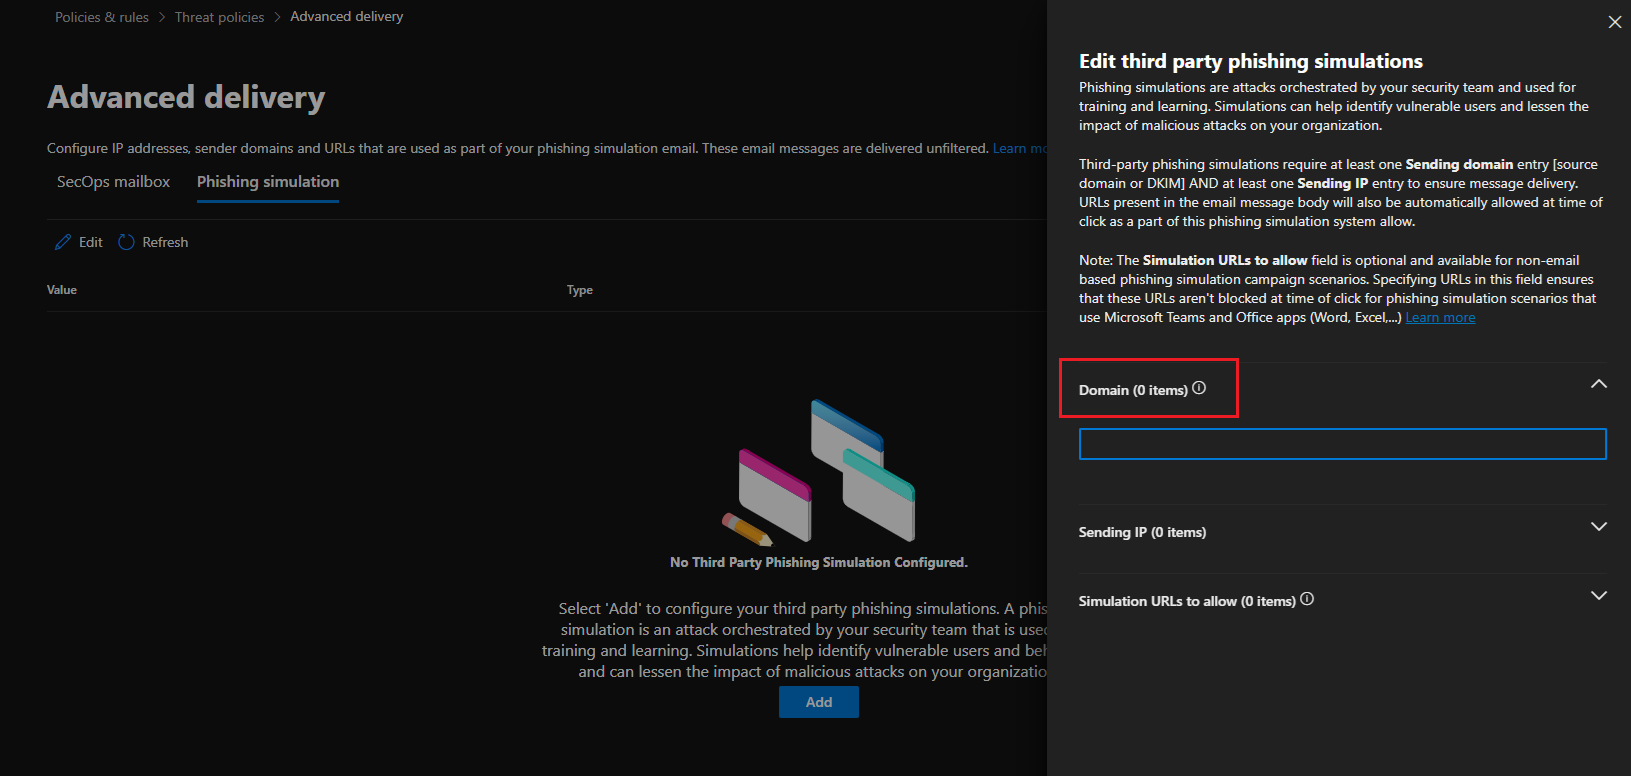
b. Sending IP: Input the IP addresses provided by Dcoya Managed Services.
6. Save Your Configuration:
a. If this is a first-time addition, click "Add," and then click "Close."
b. If you are editing existing values, click "Save," and then click "Close."
Steps to Whitelist Spam Filtering
To whitelist spam filtering for Dcoya Phishing Simulation emails, follow these steps:
IP approach:
1. Visit the following URL to access the Exchange Admin Center for Microsoft: https://admin.exchange.microsoft.com/#/transportrules.
2. On the Exchange Admin Center page, locate and click on the plus sign icon (➕) to create a new rule.
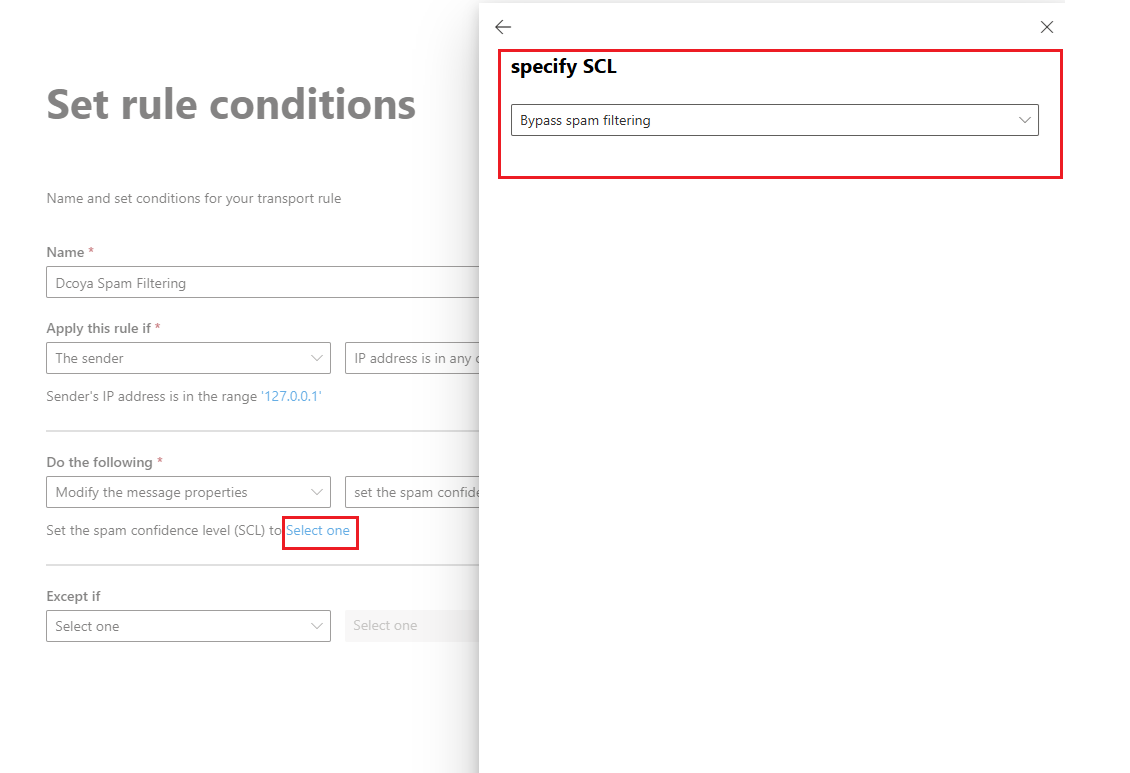
3. Provide a meaningful name for the rule, such as "Dcoya Spam Filtering."
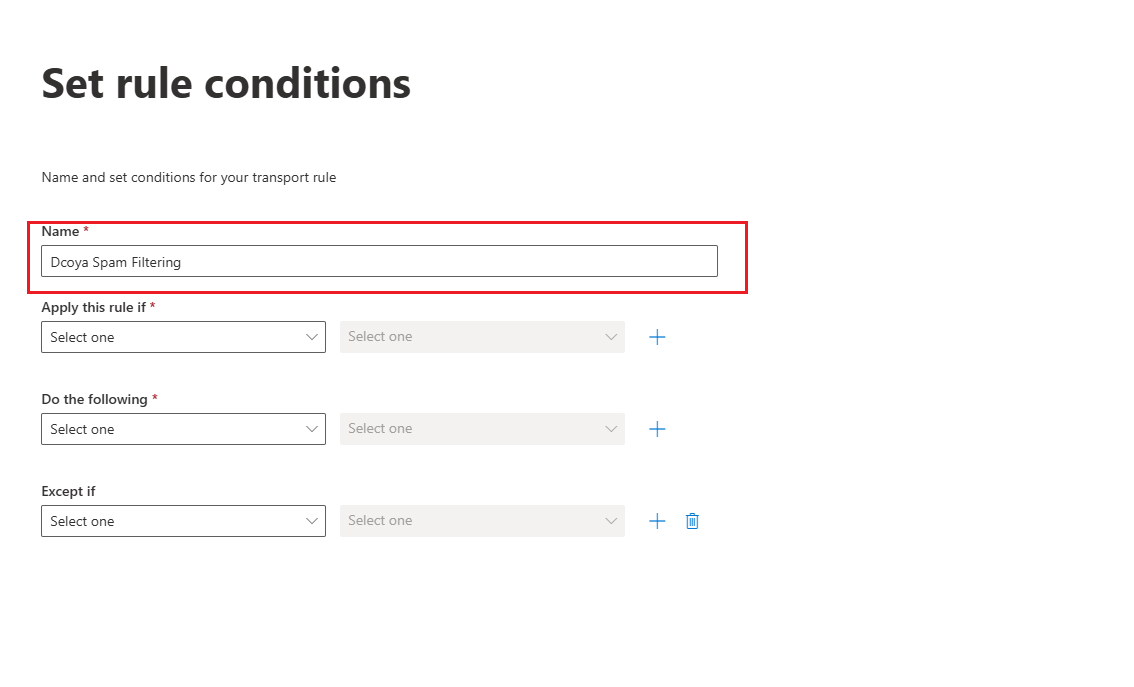
4. Click on "Apply this rule if → The sender → IP address is in any of these ranges or exactly matches."
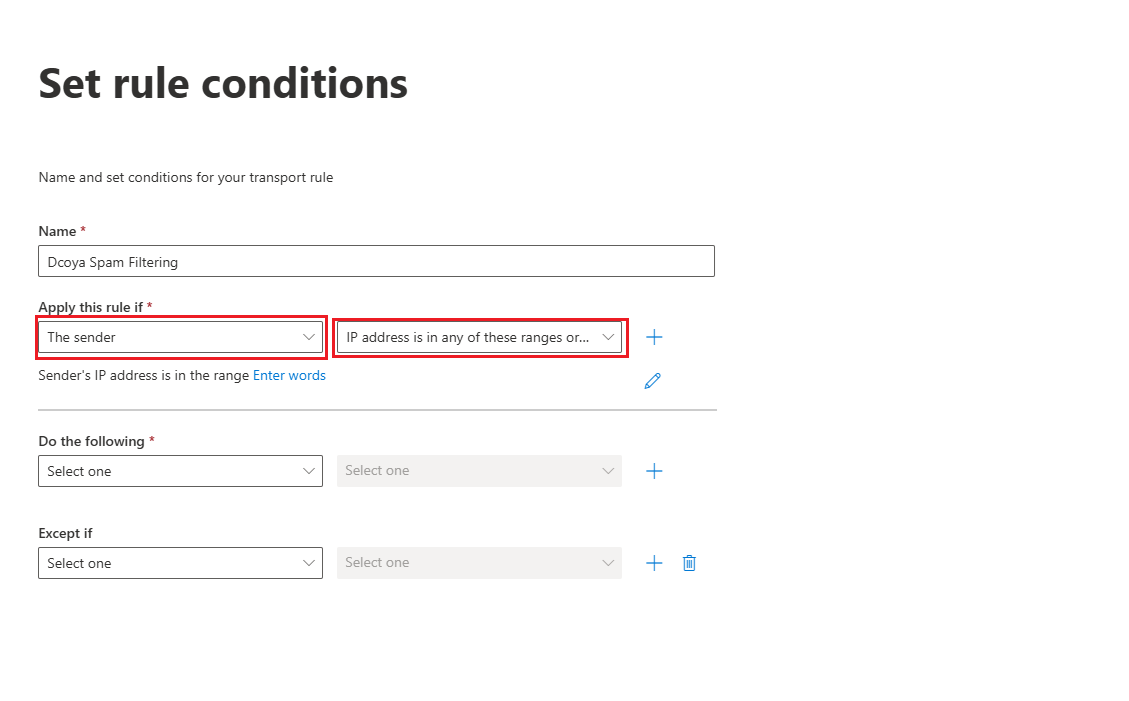
5. Specify IP Addresses: In the designated field, input the IP addresses one by one from the provided list.
a. Add the IP address provided by Dcoya Managed Services.
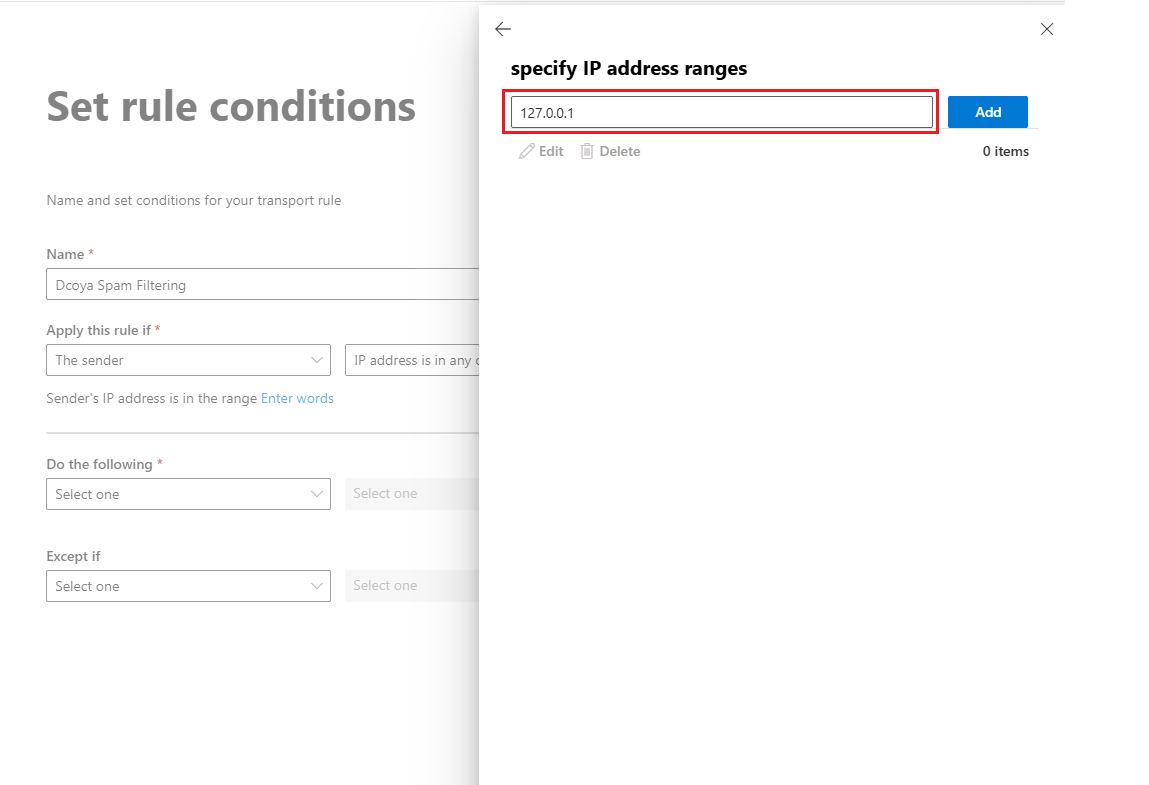
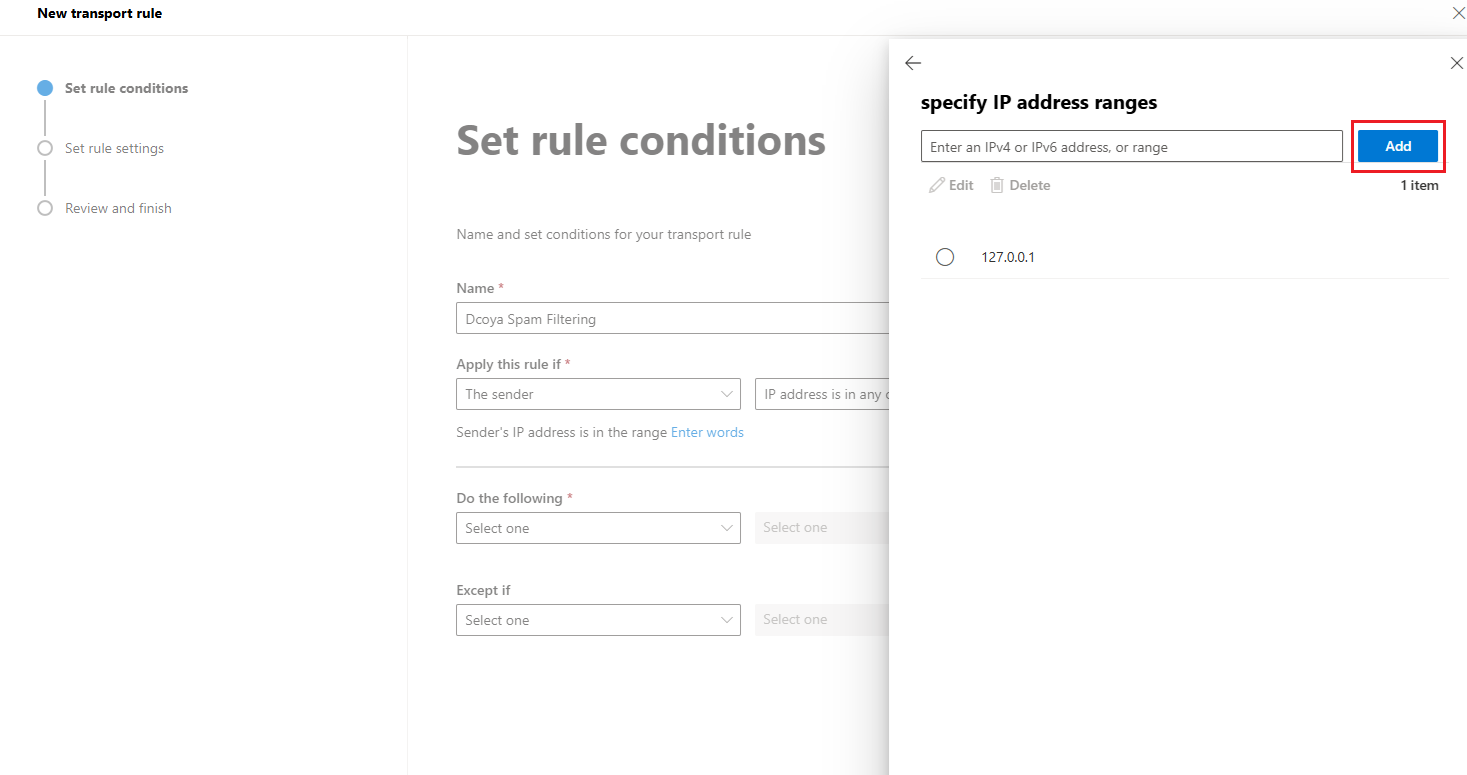
b. Remember to click "Save" after entering each IP address.

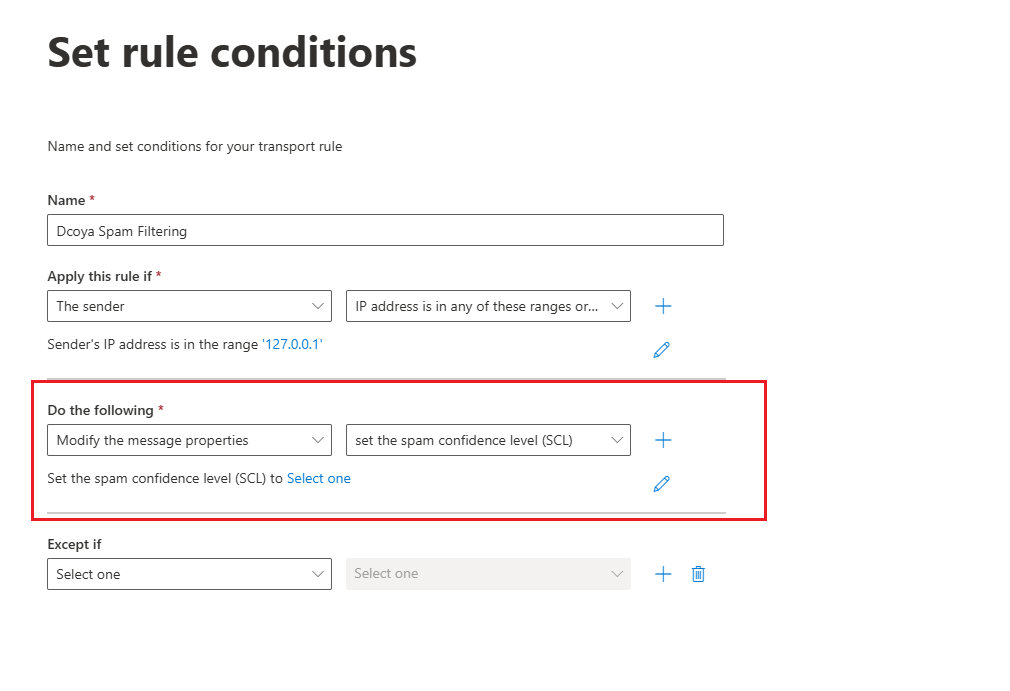
6. Modify Message Properties: Click on "Do the following → Modify the message properties → Set the spam confidence level (SCL) to = bypass spam filtering."
7. Click on the "Next" button to continue.
8. Leave the "Set Rule" settings as they are.
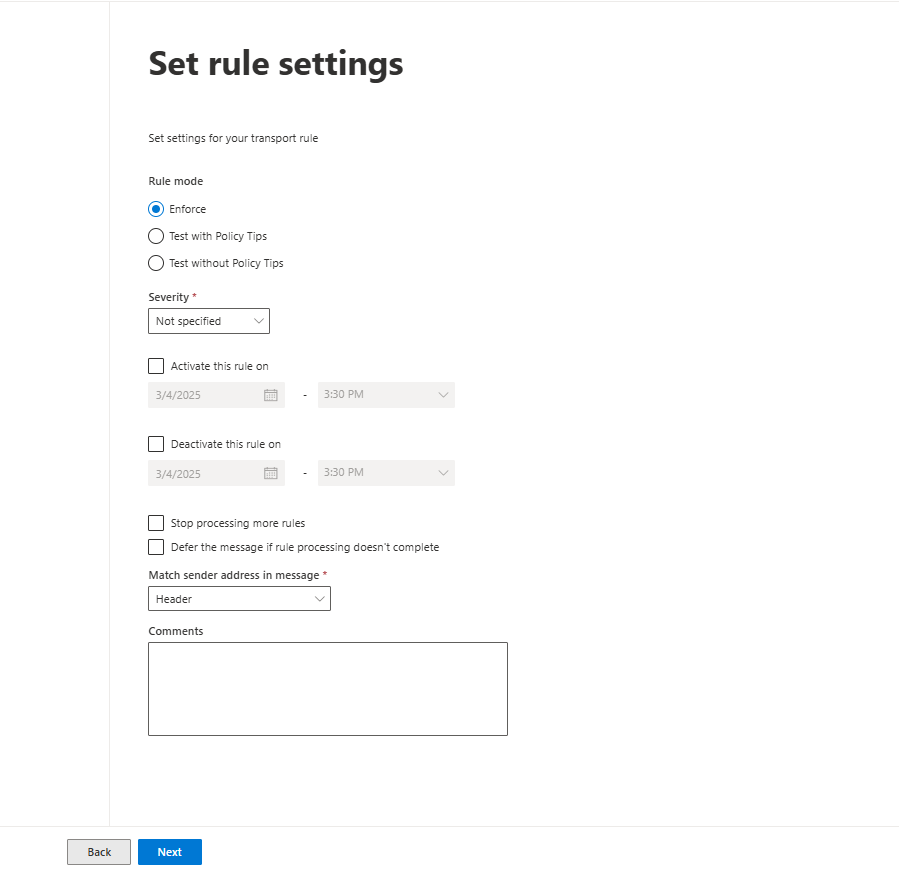
9. Click on the "Next" button to continue.
10. Verify Rule Settings:
a. Ensure that the rule is enabled.
b. Set the priority of the rule to the lowest number possible.
11. Select the “Finish” button
Headers approach:
1. Visit the following URL to access the Exchange Admin Center for Microsoft: https://admin.exchange.microsoft.com/#/transportrules.
2. On the Exchange Admin Center page, locate and click on the plus sign icon (➕) to create a new rule.
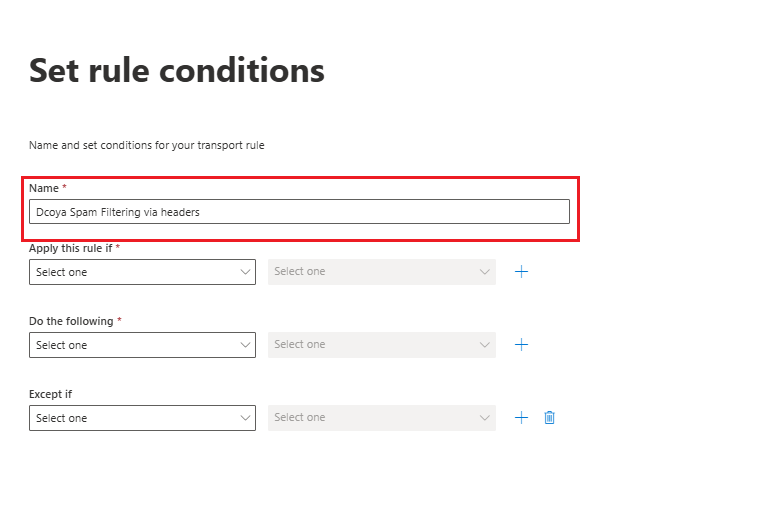
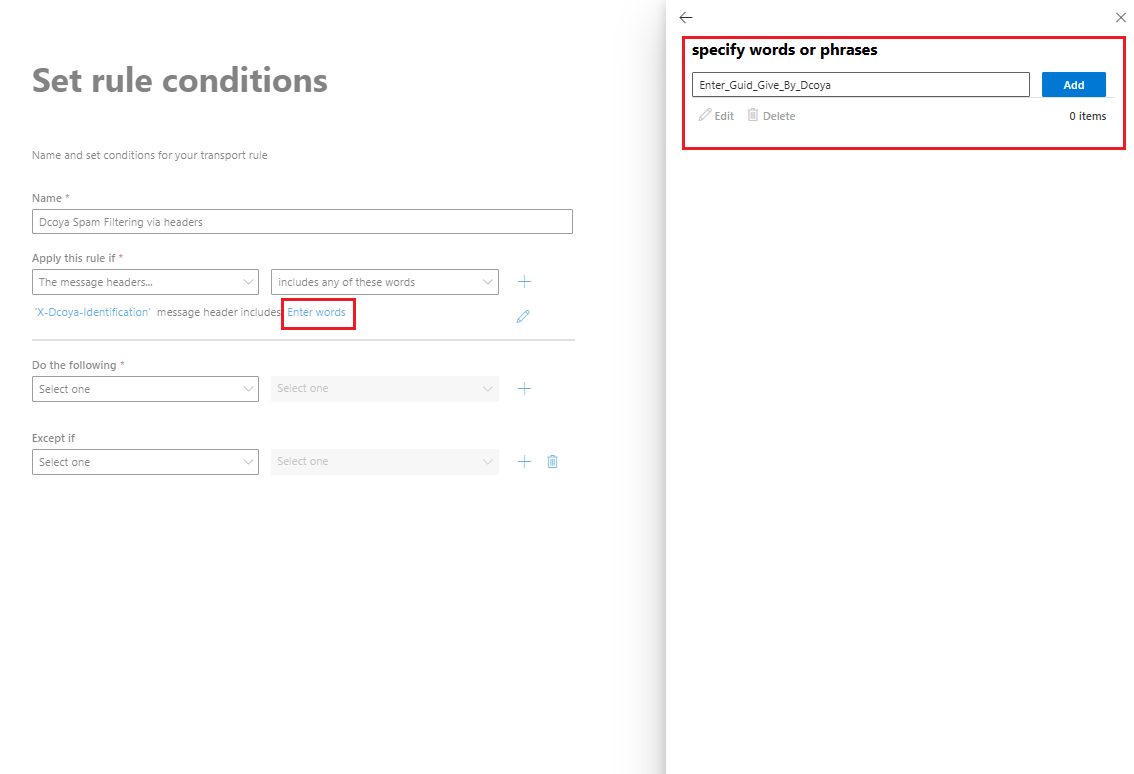
3. Provide a meaningful name for the rule, such as "Dcoya Spam Filtering via headers."
4. Click on "Apply this rule if → The message headers → includes any of these words."

a. Click on the "Enter text" field, type the header name as "X-Dcoya-Identification."
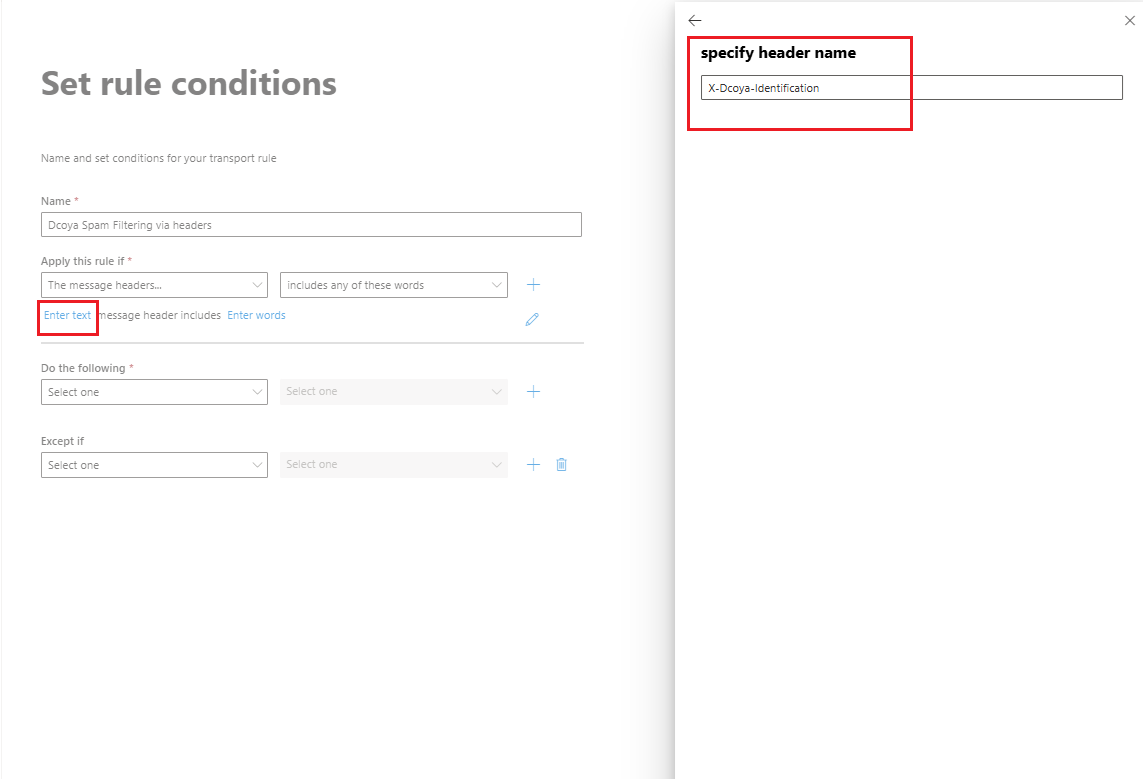
b. Click the "Enter words" field, type the custom guid that will provide you by Dcoya Managed Service and press add.
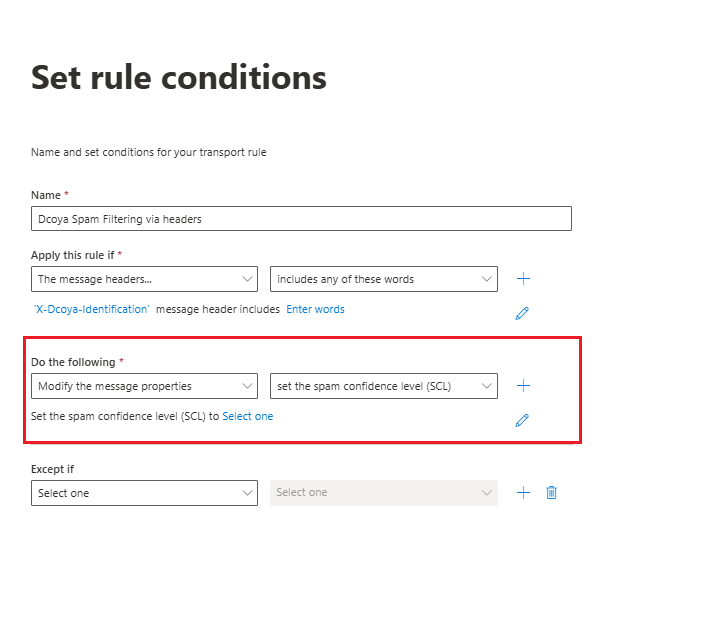
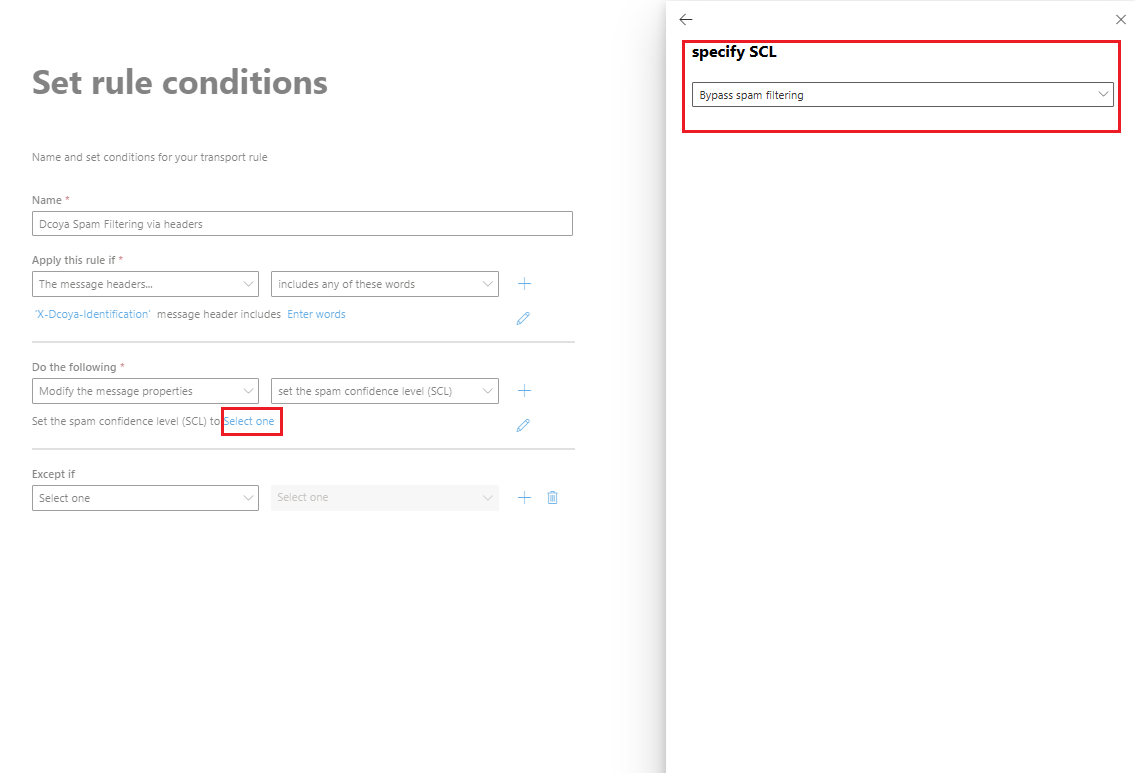
5. In the "Do the following" condition, select "Modify the message properties" and then choose "set the spam confidence level (SCL) to = Bypass spam filtering"
6. Click on the "Next" button to continue.
7.Leave the "Set Rule" settings as they are.
8. Click on the "Next" button to continue.
9. Verify Rule Settings:
a. Ensure that the rule is enabled.
b. Set the priority of the rule to the lowest number possible.
10. Select the “Finish” button